
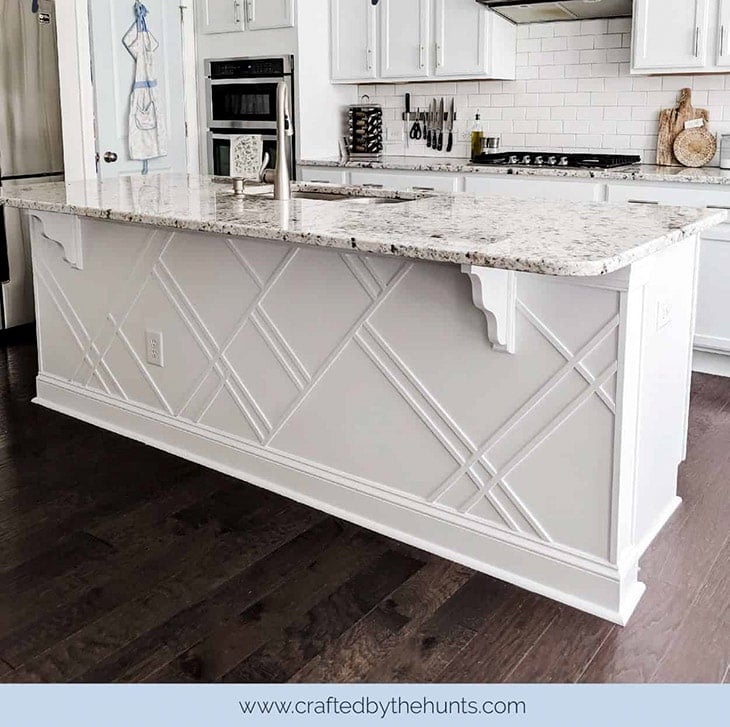
Millwork detail on island Kitchen island molding, Kitchen, Cool kitchens
Next - Install the Baseboard & Frame Each Side of the Island. The next step was to install the baseboard around the 2 sides and the back of the island. Then I framed each side of the island with the 1/4″ thick poplar strips, essentially making a box. On the front side, the strips were pushed right up next to the front cabinet facing, and on.

Upgrade Your Kitchen Island Kitchen island molding, Diy kitchen
We're back with another episode of HGG Home. our DIY, Design and Lifestyle Series! Today we are sharing how we turned our builder basic kitchen island into.

This was a super quick, inexpensive, easy weekend project, that
Our kitchen island base is 5 feet wide x 4 feet deep. These are the basic supplies one need for adding a design such as this. Links are included if you are not familiar with a tool. ½ x 6 boards in poplar, oak, or birch (varying lengths) ½ x 4 boards in poplar, oak, or birch (varying lengths) (2) Traditional Corner Posts.
Easy Kitchen Island Molding Ideas 2023 AtOnce
Free Shipping Available. Buy on ebay. Money Back Guarantee!
Add columns to kitchen island Kitchen island makeover, Kitchen
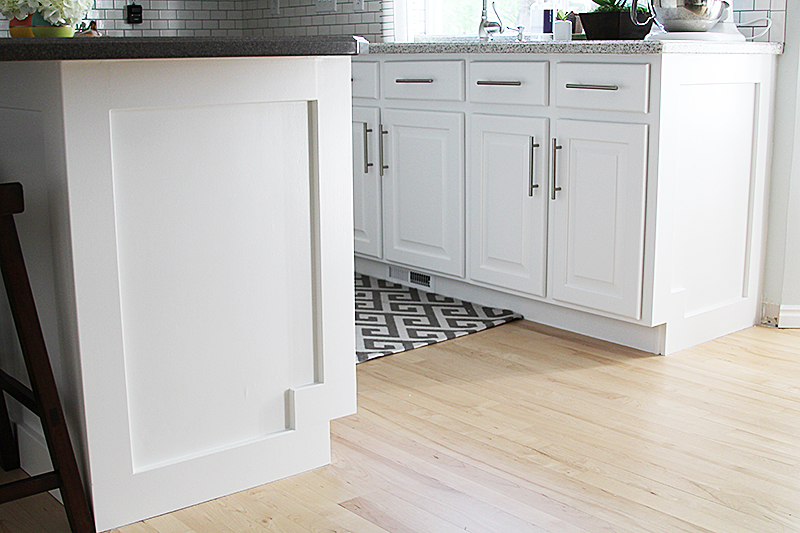
Step 1: Remove existing trim. Using the mini crowbar, pull the existing trim and/or moulding off the island. I was afraid of damaging the wood panels on the island, so I worked a little cautiously at first, but this actually wasn't too bad once I got the hang of it.

Upgrade Your Kitchen Island JENRON DESIGNS Kitchen Island Molding
Adding moulding to a kitchen island is an easy, inexpensive way to upgrade a builder grade island. Recently we refinished our kitchen cabinets in 2 days (for less than $20!) by staining them with Minwax Polyshades. I love how it turned out, but I wanted to do something different with my kitchen island. The kitchen island originally looked like.

HOW TO ADD MOULDING TO A KITCHEN ISLAND Stagg Design Kitchen island
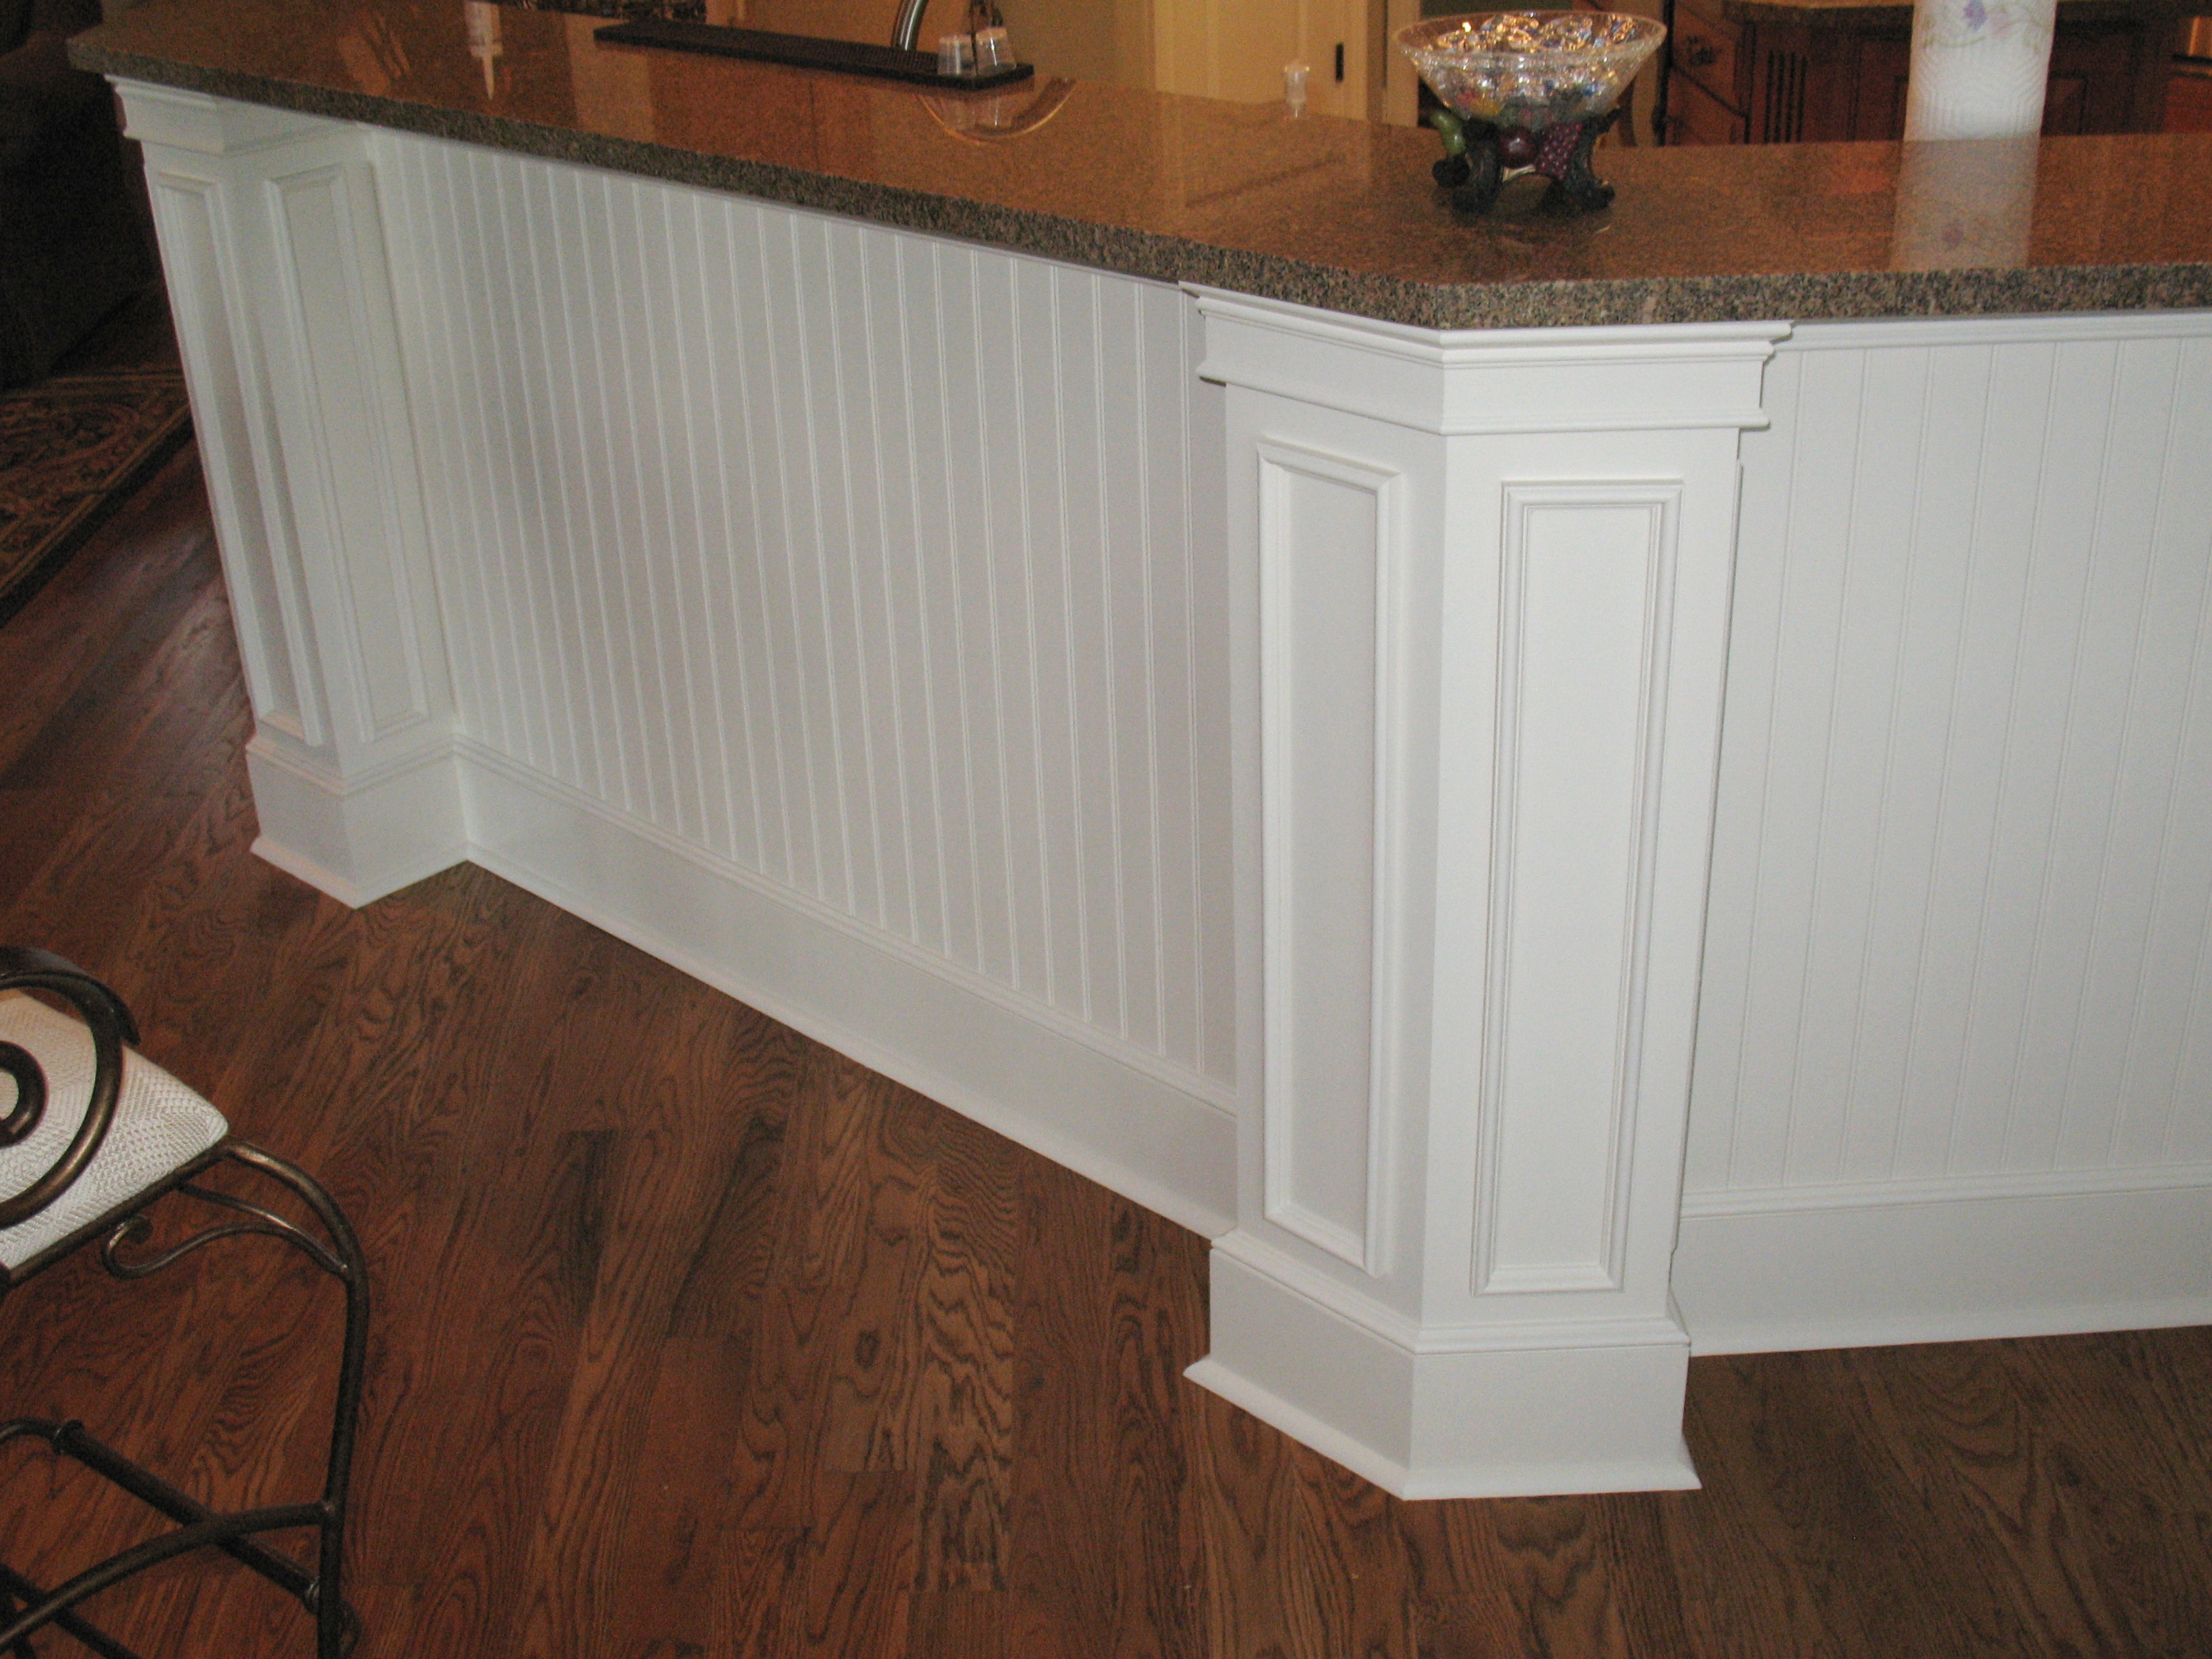
Here is a shot of the island with all of the molding in place. Now it is time to patch the nail holes and sand them smooth, in preparation for the paint job. We always like to take the time to caulk the gaps between the 1×4's and the beadboard. This gives it a nice professional clean look after it is painted.

12 Creative Trim Ideas To Take Your Kitchen Island To The Next Level!
Install Vertical Batten Pieces. Photo Credit: Remodelaholic. Next nail on the horizontal boards on top and bottom, in-between the corners. Then the vertical dividers spaced evenly. You may notice that the bottom of the board and batten is not on the ground. The plan is to wrap the entire island in base molding over that gap.
HOW TO ADD MOULDING TO A KITCHEN ISLAND Stagg Design
Learn how to add base and moulding to your kitchen island with this detailed step-by-step guide. Enhance the look of your island and give it a polished, finished appearance with these easy-to-follow instructions. 1014 35th St. Galveston, Texas 77390. Mon - Sat: 9:00am-18:00pm. Sunday CLOSED

Upgrade Your Kitchen Island JENRON DESIGNS Kitchen Island Molding
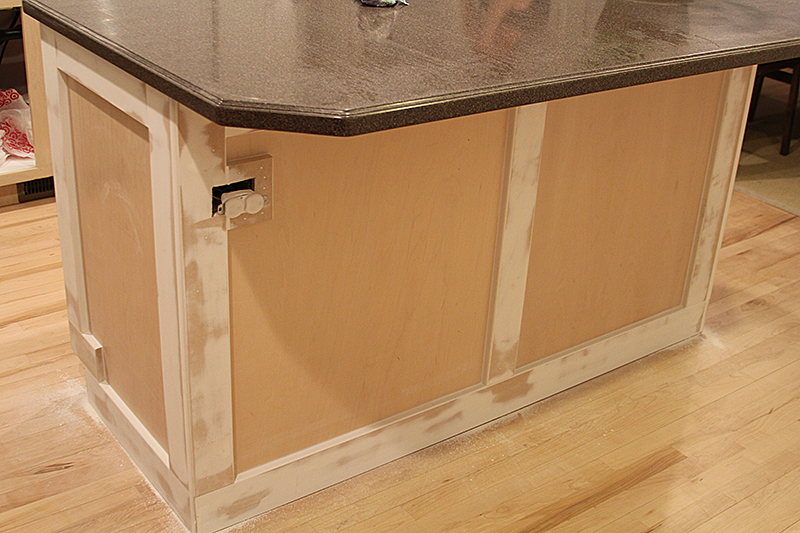
To get around the plugs, we cut a notch out of the moulding, then cut a small piece, also with a notch, to make a little frame around it. Once the moulding was all in place, we used spackle to fill in the nail holes and seams. Then we used an electric sander to sand it all down. And in the process added a thick layer of dust everywhere.

Pin on Awesome Tutorials
Add the Corner Molding. At the two outside back corners of the island, measure the vertical distance between the top of the baseboard and the top of the island. Cut off two sections of wood corner molding to this length. Use the 3/4-inch brads in the electric nailer. Nail the corner molding on the back corners.

DIY kitchen island remodel Addicted2projects Kitchen Island Molding
Looking to elevate the style of your kitchen island? Adding molding panels can be a fantastic way to give your island a custom, high-end look. Whether you have a plain, flat-sided island or are simply looking to add some depth and character to your existing island, this DIY project is both affordable and relatively easy to accomplish..

Molding Makeover Update Kitchen island molding, Kitchen island
Others use cabinet molding to give the kitchen islands a personal look. Install them on cabinets to make them look finished. Adding trim to your kitchen islands will enhance the look and layout of the area. The place can look nice and the atmosphere pleasant. Types Of Trim . Putting a trim on your kitchen island can improve its looks.

Add Molding to a Builder Grade Kitchen Island An Easy HowTo Kitchen
How much trim do you need for a slatted kitchen island. To calculate the number of boards you need for the slat trim, measure the width of the island. I used 1×2 boards with ¾" spacing for my trim so we will use that as an example. Subtract 1½ from the width. Each slat will take up 1½" + ¾" = 2 ¼". Divide the result of step 1 by 2.
HOW TO ADD MOULDING TO A KITCHEN ISLAND Stagg Design
02 of 31 Bright Kitchen with Light Wood Floors. PHOTO: holmessweethome_615. A light-colored wall with a flat white baseboard connects with the light wood floor of this kitchen. Two large glass lamps hang over the light green kitchen island with a white countertop. Long silver pulls are attached to the white cabinets.

Upgrade Your Kitchen Island JENRON DESIGNS Kitchen Island Molding
A kitchen island will offer this to you regardless if you prepare cooking, entertaining, or both. So first determine how you would like to use your storage. Below are common ways kitchen island storage is used. Features. Place your larger countertop appliances in your island in tall cabinets with pull out trays.
